-
Common Problems You Can Fix by Ordering Waterproofing Services
Waterproofing is essential to a safe and dry home, particularly in areas like the basement, where water damage is common. Without effective waterproofing, moisture can penetrate walls, floors, and foundations, leading to costly repairs and potential health risks. Triad Basement Waterproofing offers a variety of solutions to keep your home safe from moisture, so you can avoid the risks of water damage and enjoy a secure living space.
The Importance of Waterproofing
Waterproofing is a key preventive measure that protects your home from water infiltration, especially in basements where moisture can quickly accumulate. A well-waterproofed basement safeguards your home’s foundation, prevents structural damage, and reduces the chances of mold and mildew growth. Additionally, waterproofing enhances your home’s overall value, offering peace of mind that your property is well-protected from water-related issues.
Consequences of Poor Waterproofing
Failing to waterproof your basement can lead to a variety of problems. Moisture intrusion not only weakens the structural integrity of your home but can also cause:
- Foundation Cracks and Shifting – Excess moisture can lead to expanding soil around the foundation, causing cracks and structural shifts.
- Mold and Mildew Growth – Damp environments are breeding grounds for mold, which poses health risks and can damage your belongings.
- Decreased Property Value – Homes with water damage lose value, making them harder to sell in the future.
- Increased Repair Costs – Moisture-related damage can lead to costly repairs, from fixing cracked walls to removing mold.
Common Waterproofing Issues
Several common issues can lead to basement moisture and leaks:
- Poor Drainage – Improperly sloped landscapes or blocked drains can cause water to pool around the foundation.
- Foundation Cracks – Small cracks in the foundation can quickly become entry points for water.
- Leaky Windows and Doors – Basement windows and doors without proper seals allow water to seep inside during heavy rains.
- Hydrostatic Pressure – Pressure from groundwater pushes moisture through basement walls and floors, especially after long periods of rain.
Benefits of Professional Waterproofing
Professional waterproofing services offer numerous advantages for homeowners dealing with basement moisture issues:
- Protection Against Structural Damage – By addressing moisture at its source, waterproofing protects your home’s foundation.
- Healthier Indoor Environment – Professional waterproofing reduces the risk of mold growth, enhancing indoor air quality.
- Lower Energy Bills – A dry basement is easier to insulate, helping to regulate indoor temperatures and reduce energy costs.
- Enhanced Home Value – Waterproofing adds value to your home by preventing costly water damage and potential resale issues.
Common Problems Addressed by Professional Waterproofing
Professional waterproofing services can effectively resolve a range of basement water issues:
- Basement Flooding Prevention – Comprehensive waterproofing helps keep floodwaters out, even during heavy storms.
- Moisture Control – Services like interior and exterior basement waterproofing effectively manage moisture levels, preventing dampness.
- Foundation Repair – Waterproofing often includes sealing foundation cracks to stop water from seeping in.
- Mold Prevention – By controlling humidity, waterproofing prevents the growth of mold and mildew, improving your home’s air quality.
At Triad Basement Waterproofing, we offer tailored solutions to address these issues, ensuring that your home remains dry, secure, and free from the negative effects of water damage.
Remedial Waterproofing Services by Triad Basement Waterproofing
When water issues are already present, remedial waterproofing is the solution to restore and protect your basement. We offer a range of services, including:
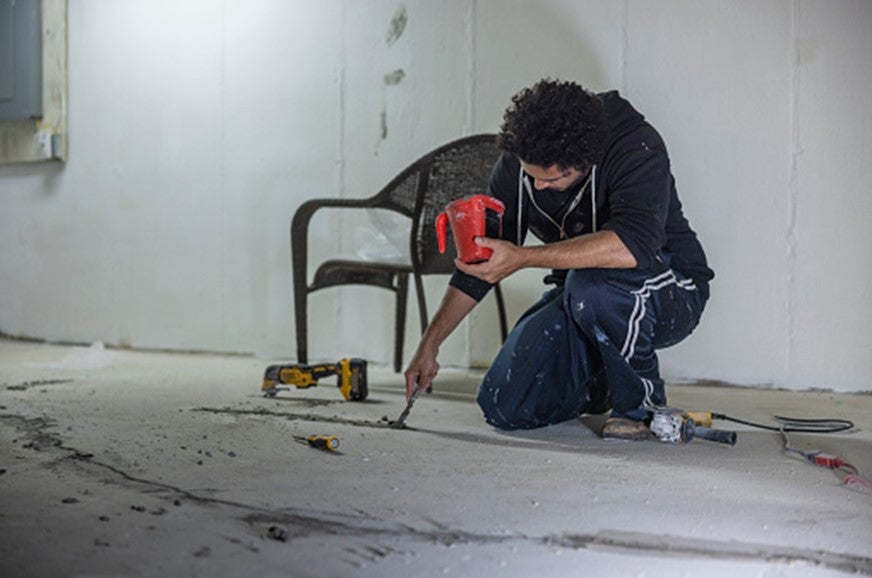
- Interior Basement Waterproofing – Sealing and protecting basement walls and floors to block moisture from entering.
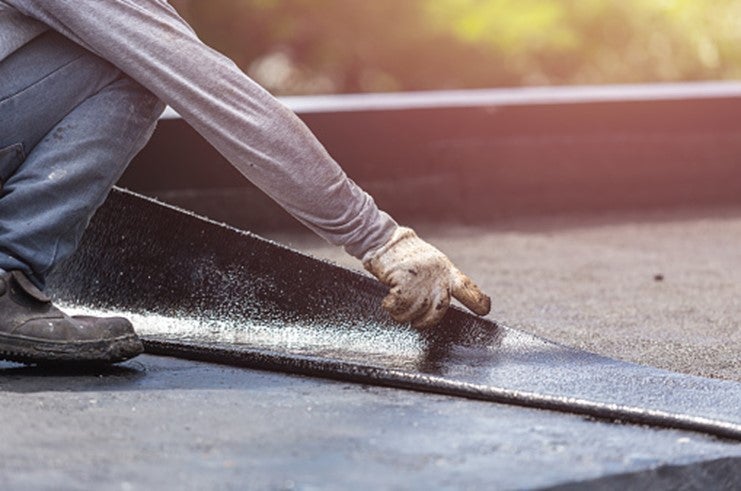
- Exterior Basement Waterproofing – Creating a barrier around the foundation to prevent groundwater from penetrating the basement.
- Sump Pump Installation – Installing a sump pump to actively remove water from your basement, keeping it dry during storms.
- French Drains – Placing these drains around your foundation to help direct water away from your home’s structure.
Tired of Dealing with Basement Moisture Problems?
If you’re experiencing basement waterproofing issues or want to prevent potential moisture problems, reach out to Triad Basement Waterproofing. We’re here to help keep your home safe from water damage with trusted solutions and expert guidance.
Work with the Best
Triad Basement Waterproofing has been safeguarding homes in Maryland, Virginia for over 35 years. Our skilled team addresses basement, crawl space, and foundation issues with thorough, cost-effective waterproofing solutions, protecting your home from water damage. As a family-owned business, we’re committed to quality, using top-grade materials and focusing on customer care and education. Schedule a free consultation to discuss how we can keep your home safe and dry. Contact us today for reliable, effective waterproofing services that keep your basement dry and your home secure.
-
The Dangers of a Prolonged Wet Basement
A wet basement may seem like a minor inconvenience, but the problems it can cause are anything but small. Water seepage and excess moisture can damage a home’s foundation, ruin belongings, and lead to serious health risks. At Triad Basement Waterproofing in Gaithersburg, MD, we understand how moisture issues can quickly escalate and why addressing them promptly is so important.
What Causes a Wet Basement?
Understanding the causes of a wet basement is the first step in solving the problem. A variety of factors can lead to water infiltration, including:
- Poor Drainage – If water isn’t directed away from your home, it can seep into the basement through walls and floors, leading to long-term issues.
- Foundation Cracks – Small cracks in the foundation allow water to find its way into the basement, especially after heavy rains or snow melt.
- Faulty Gutters and Downspouts – When gutters or downspouts aren’t functioning properly, water can pool around the foundation, increasing the risk of leaks.
- Hydrostatic Pressure – Groundwater that builds up around the home exerts pressure on basement walls and floors, pushing moisture inside and weakening structural integrity.
Why Is a Wet Basement Bad?
A wet basement isn’t just inconvenient, it’s damaging. Moisture can weaken a home’s structure, leading to costly repairs over time. In addition, water encourages mold growth, which can have severe effects on indoor air quality and personal health. Ignoring a wet basement often leads to worsening conditions that are more difficult and expensive to fix.
Signs of a Chronic Wet Basement Problem
Identifying early signs of a wet basement problem can prevent more extensive damage. Look for these common indicators:
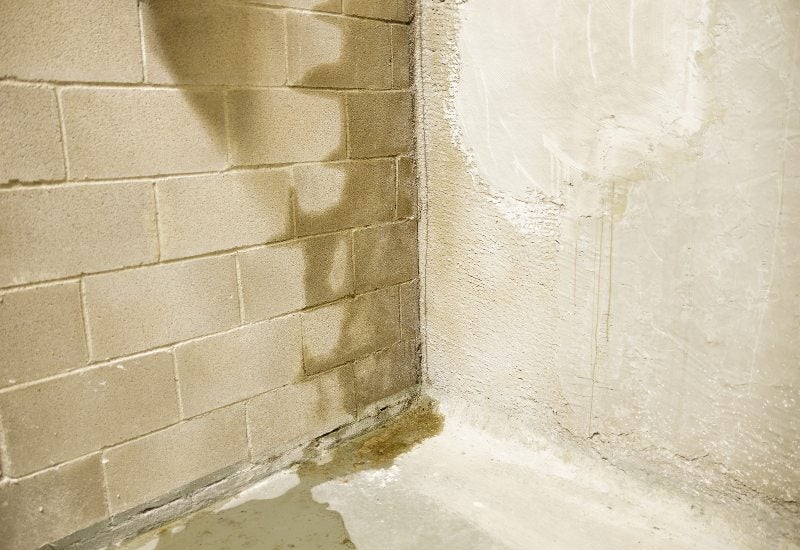
- Visible Water Stains – Brown or white stains on basement walls are a sign of water intrusion.
- Damp or Musty Odor – Persistent odors often point to mold or mildew buildup, which is both unsightly and unhealthy.
- Peeling Paint or Efflorescence – White, powdery residue on walls can be a sign of water evaporation and mineral deposits.
- Cracks in Walls or Floors – Growing cracks indicate worsening water pressure on the foundation, a clear warning sign.
If you notice any of these signs, it may be time to contact Triad Basement Waterproofing for a professional inspection.
How Moisture Leads to Health Problems
Excess moisture isn’t just bad for your home; it’s also bad for your health. When water seeps into a basement, it creates the ideal environment for mold growth. Mold spores travel through the air, entering other parts of the house and impacting indoor air quality. Over time, exposure to mold can cause respiratory issues or skin irritation, and those with those with compromised immune systems are especially vulnerable to mold-related health issues.
Preventative Measures for a Wet Basement
Taking action now can protect your basement from water damage and its health risks. Here are some effective steps to help prevent moisture issues:
- Basement Waterproofing – Professionally waterproofing your basement is the best way to keep moisture out. We offer comprehensive wet basement waterproofing solutions tailored to your home.
- Improving Drainage – Installing proper drainage solutions, like French drains or sump pumps, helps redirect water away from your basement.
- Sealing Cracks – Repairing foundation cracks keeps water from seeping in and protects the structural integrity of your home.
- Gutter Maintenance – Regularly clean and maintain gutters to ensure rainwater is directed away from the foundation.
Each of these preventative measures is designed to protect your basement from future water issues and avoid costly repairs down the road. Our team at Triad Basement Waterproofing can assess your basement’s needs and recommend the best solutions.
Are You Ready to Resolve Your Wet Basement Issues?
Don’t let a wet basement compromise your home and health. Triad Basement Waterproofing has years of experience helping homeowners in Gaithersburg, MD, tackle their moisture problems. With our reliable and expert team, we’ll work to keep your basement dry and your home safe.
Why Choose Us?
Since 1987, Triad Basement Waterproofing, a family-owned Maryland business, has delivered trusted waterproofing and foundation solutions. Serving Maryland, Virginia, and D.C., we combine decades of expertise with high-quality materials to protect homes from costly water damage and structural issues. We provide comprehensive inspections, offer tailored solutions, and prioritize customer education to prevent future issues. Let us help you secure your home’s safety, beauty, and value with our effective, efficient service. Contact us today to discuss how we can help protect your home with effective, long-lasting solutions.
-
Is Your Downspout Causing Water in Basement Walls?
Is Your Downspout Causing Water in Basement Walls?
Water in your basement can be a homeowner’s nightmare, leading to structural damage and mold growth. One common yet overlooked cause of basement water issues is a faulty downspout system. Triad Basement Waterproofing in Gaithersburg, MD, offers expert solutions to help keep your basement dry and secure.
What is a Downspout?
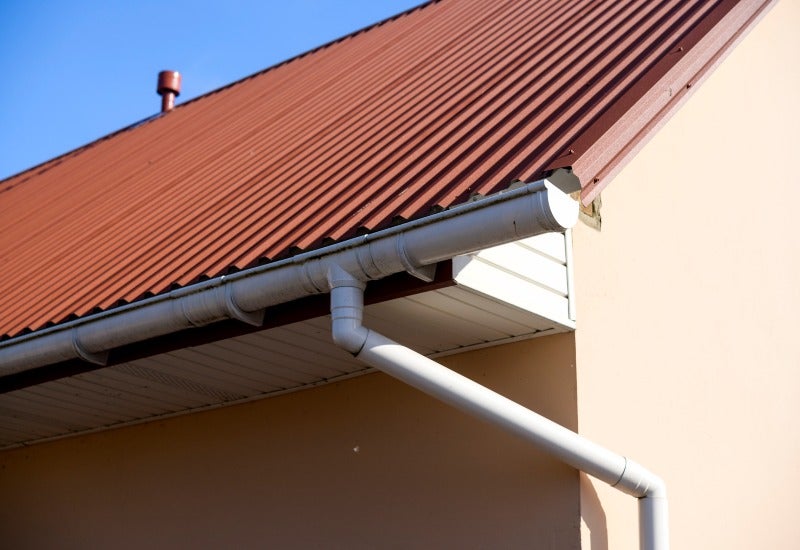
A downspout is a vertical pipe attached to your gutters that directs rainwater away from your home’s foundation. It plays a vital role in your home’s drainage system by ensuring that water collected by the gutters is channeled safely away from the house. However, if the downspout is not functioning properly, it could cause water to pool around the foundation, leading to basement leaks and other water damage.
How Do Gutters and Downspouts Get Clogged?
Downspouts can become clogged with debris, such as leaves, twigs, and dirt. Over time, this buildup can prevent water from flowing freely through the system. When gutters and downspouts are clogged, water can overflow and accumulate near your foundation, eventually seeping into your basement walls.
Regular maintenance is essential to prevent clogs. Cleaning your gutters and downspouts at least twice a year can help maintain proper water flow and protect your basement from water damage. In some cases, installing gutter guards can also help reduce the frequency of clogs by keeping larger debris out of the gutters.
Methods for Preventing Water from Entering Your Basement
If you are dealing with water in your basement, several methods can help keep your space dry and protected:
Add a Basic Gutter with Planned Extensions
Installing a basic gutter system with planned extensions can significantly reduce the risk of basement water issues. Extensions should direct water at least five feet away from your home’s foundation. This simple addition can prevent water from pooling near the base of your home and seeping into the basement.
Restore the Crown Management
The crown of your yard refers to the slope of the ground around your home. The ground should slope away from the foundation to direct water away from the home. If the slope has become uneven or eroded over time, restoring the crown management can help prevent water from accumulating near your basement walls.
Repair the Footing Drains
Footing drains are installed around the perimeter of your foundation to direct water away from your home. Over time, these drains can become clogged or damaged, reducing their effectiveness. Repairing or replacing faulty footing drains can help ensure that water is properly diverted away from your basement.
Pump Out the Water
In cases of severe water accumulation, installing a sump pump can be an effective solution. A sump pump system collects water in a pit (sump basin) that pumps it out of the basement and away from your home. This method is particularly useful in areas with a high water table or frequent heavy rainfall.
Waterproof the Upper Part of the Walls
Waterproofing the upper part of your basement walls can provide an additional layer of protection against moisture. Applying a waterproof coating or sealant to the exterior walls can help prevent water from penetrating the walls and causing damage.
Additional Preventive Measures
Beyond these primary methods, there are additional steps you can take to further protect your basement from water damage:
- Regular Inspections – Regularly inspecting your basement, gutters, downspouts, and surrounding landscape can help you identify potential problems before they escalate. Look for signs of water damage, such as damp spots, mold, or efflorescence (white powdery substance on walls).
- Install a French Drain – A French drain is a trench filled with gravel or rock, containing a perforated pipe that redirects surface water and groundwater away from the foundation. It can provide an effective way to manage water flow and prevent it from reaching your basement.
- Improve Ventilation – proper ventilation in your basement can help reduce humidity levels and prevent condensation, which can contribute to water damage and mold growth
Comprehensive Basement Waterproofing Solutions in Gaithersburg, MD
Water issues in your basement can cause significant problems if not addressed promptly. By understanding the role of downspouts and implementing effective solutions, you can safeguard your home against water damage. Triad Basement Waterproofing is here to assist you every step of the way, offering professional and reliable solutions tailored to your specific needs. Protect your home today and enjoy Peace of Mind knowing your basement is safe and dry.
Triad Basement Waterproofing in Gaithersburg, MD, is your trusted partner in basement waterproofing solutions. Our experienced team is dedicated to providing top quality services including gutter downspout maintenance, footing drain repairs, sump pump installation, and waterproofing solutions. Protect your home from water damage and maintain a dry, safe basement with our expert assistance.
Choose Triad Basement Waterproofing in Gaithersburg, MD
Contact us today to schedule a consultation and learn about how we can protect your home. Visit our website at Triad Basement Waterproofing to explore our services and discover why homeowners in Gaithersburg trust us for their waterproofing needs.
-
How Important Is A Battery Backup For My Sump Pump?
How Important is a Battery Backup for My Sump Pump?
A sump pump is a critical component of any home’s defence against basement flooding. Without it, your basement is at risk of water damage, mold growth, and structural issues. Triad Basement Waterproofing in Gaithersburg, MD, provides expert solutions to protect your home, including the installation and maintenance of battery backup systems for sump pumps.
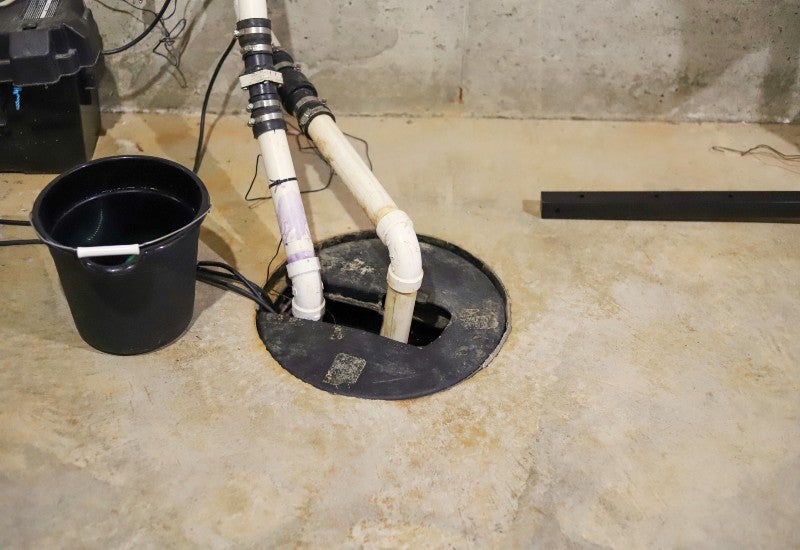
What is a Sump Pump System?
A sump pump system is designed to keep your basement dry by removing water that accumulates in a sump basin, usually located in the basement’s lowest part. The pump activates when the water level rises, expelling the water outside and away from your home’s foundation. This process helps to prevent flooding and moisture-related issues.
Does a Basement Foundation Require a Sump Pump?
Not every home has a basement, but for those that do, a sump pump is essential. Basements are prone to water infiltration due to their location below ground level. Factors such as heavy rainfall, high water tables, and improper drainage can lead to water entering your basement. A sump pump provides a safeguard by actively removing this water, protecting your home’s foundation, and preventing potential damage.
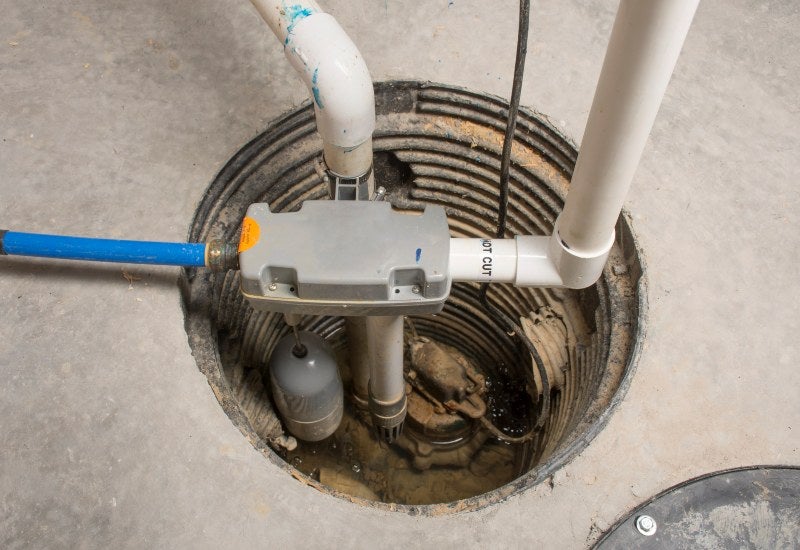
What Happens if a Sump Pump Failure Occurs?
Sump pump failures can happen for various reasons, including power outages, mechanical issues, or clogged discharge lines. When a sump pump fails, the water in the basin overflows, leading to basement flooding. This can cause significant damage to your home’s foundation, belongings, and overall structure. Addressing sump pump failures quickly is vital to minimize damage and repair costs.
Is a Battery Backup Sump Pump Right for My Home?
A battery backup sump pump is an additional pump that operates on battery power when the primary sump pump fails or during a power outage. This backup system is activated automatically, providing continuous protection against flooding. If your area is prone to power outages or your home has experienced sump pump failures in the past, a battery backup system is a smart investment.
How Do I Do Sump Pump Maintenance?
Regular maintenance of your sump pump system is necessary for its reliable operation. Here are some maintenance tips:
- Inspect and Clean – Check the sump basin and clean it regularly to prevent clogs.
- Test the Pump – Periodically pour water into the basin to ensure the pump activates and discharges water properly.
- Check the Power Source – Make sure the sump pump is connected to a functioning power source. Inspect the electrical connections for any signs of wear or damage.
- Inspect the Discharge Line – Check the discharge line to make sure it’s clear and free from obstructions and that it’s properly directing water away from your home’s foundation.
- Battery Maintenance – If you have a battery backup system, check the battery’s charge level and condition regularly. Replace it as needed to ensure it functions properly.
The Benefits of a Battery Backup Sump Pump
A battery backup sump pump offers several advantages that make it an essential addition to your home’s waterproofing system:
- Continuous Protection – During power outages or primary pump failures, the battery backup ensures your basement remains dry.
- Peace of Mind – Knowing you have an additional layer of protection against flooding provides peace of mind, especially during storms or heavy rainfall.
- Reduced Risk of Water Damage – A battery backup system helps prevent costly water damage and mold growth by maintaining a dry basement.
- Increased Home Value – Homes with reliable waterproofing systems, including battery backup sump pumps, are more attractive to potential buyers, enhancing property values.
Protect Your Home with Reliable Sump Pump Systems and Battery Backup Solutions
By understanding the importance of a sump pump system and the added benefits of a battery backup, you can take proactive steps to safeguard your home. Triad Basement Waterproofing is here to help you every step of the way, offering professional solutions tailored to your specific requirements.
Contact Triad Basement Waterproofing in Gaithersburg, MD
Triad Basement Waterproofing in Gaithersburg, MD, is your trusted partner for all your basement waterproofing needs. Our experienced team is dedicated to providing top-quality services, including the installation and maintenance of battery backup sump pumps. Protect your home from water damage, and ensure the longevity of your basement with our expert solutions.
Contact us today to schedule a consultation and learn more about how a battery backup sump pump can benefit your home. Visit our website at Triad Basement Waterproofing to explore our services and discover why homeowners in Gaithersburg trust us for their waterproofing needs.
-
How to Avoid Basement Flooding During Heavy Rain Seasons
Basement Flooding Repair Services in Gaithersburg, MD
How to Stop Basement Flooding with Triad Waterproofing
Restore peace of mind and security to your Gaithersburg, MD, home with Triad Basement Waterproofing’s specialized basement flooding repair services. As a seasoned industry leader with over 27 years of experience, we understand the urgency and complexity of addressing the aftermath of basement floods. Our dedicated team is equipped with the skills and tools to swiftly mitigate water damage, restore structural integrity, and prevent future flooding risks. Safeguard your property from the detrimental effects of water intrusion and ensure a dry and stable living environment. Contact us today to schedule a consultation and take the crucial step toward comprehensive basement flood recovery and prevention.

Common Causes of Basement Flooding
Understanding the common causes of basement flooding is crucial in implementing preventative measures to protect your property. Here are five frequent culprits contributing to basement flooding:
- Heavy Rainfall or Storms – Intense and prolonged rainfall can overwhelm drainage systems, causing water to seep into the basement through cracks, joints, or other vulnerable entry points.
- Poorly Functioning Sump Pump – A malfunctioning or overwhelmed sump pump can result in inadequate water removal, leading to water accumulation and potential flooding in the basement.
- Sewer Backup – Blocked or overloaded municipal sewer systems can cause sewage to back up into the basement, resulting in significant damage and health hazards.
- Foundation Cracks – Structural cracks in the foundation can create pathways for water to infiltrate the basement, especially during periods of heavy precipitation, leading to flooding and water damage.
- Improperly Installed or Clogged Gutters – Improperly installed or clogged gutters and downspouts can cause water to accumulate around the foundation, increasing the risk of basement flooding during heavy rainfall.
Top Signs of Basement Flooding
Recognizing the early signs of basement flooding is crucial in addressing potential water damage and implementing timely solutions. Here are five common indicators of basement flooding:
- Damp or Musty Odors – Noticeable musty or damp odors in the basement often indicate the presence of excessive moisture, suggesting potential water intrusion or flooding.
- Visible Water Stains – Water stains or discoloration on the walls, floors, or ceilings of the basement are clear signs of previous or ongoing water infiltration, indicating the possibility of basement flooding.
- Mold and Mildew Growth – The presence of mold or mildew on surfaces, such as walls, ceilings, or stored items, signifies a damp environment conducive to mold growth, indicating potential basement flooding or high humidity levels.
- Cracks In Walls or Floors – Newly formed cracks in the walls or floors of the basement can indicate structural shifts due to water pressure, suggesting potential water-related issues and the risk of basement flooding.
- Puddles or Standing Water – Noticeable puddles or standing water in the basement are direct indications of water intrusion, confirming the occurrence of basement flooding and the urgent need for mitigation measures.
How to Prevent Basement Flooding During Heavy Rain
Preventing basement flooding due to rain is essential for safeguarding your property against water damage. Here are five effective tips to help you mitigate the risk of basement flooding:
- Maintain Proper Gutter and Downspout Systems – Regularly clean and maintain gutters and downspouts to ensure proper water drainage away from the foundation, minimizing the risk of water accumulation around the basement.
- Install a Reliable Sump Pump System – Invest in a quality sump pump and regularly inspect and maintain it to ensure it functions effectively. This is a crucial safeguard against potential basement flooding during heavy rainfall or storms.
- Seal Cracks and Foundation Gaps – Identify and seal any cracks or gaps in the basement walls or foundation to prevent water from seeping in during heavy rainfall or flooding, minimizing the risk of water intrusion.
- Improve Yard Grading – Adjust the grading around your property to direct water away from the foundation, ensuring that surface water flows away from the basement and reducing the risk of water pooling and potential flooding.
- Consider Exterior Waterproofing – Implement exterior waterproofing measures, such as installing waterproof membranes and proper drainage systems, to create a robust barrier against water infiltration and reduce the risk of basement flooding during heavy rainfall or storms.
Contact Triad Basement Waterproofing
Reclaim the safety and resilience of your Gaithersburg, MD, residence with Triad Basement Waterproofing‘s efficient and effective basement flooding repair services. Our unwavering dedication to prompt action, combined with our extensive industry knowledge and customer-centric approach, ensures a swift and thorough recovery from basement floods during heavy rain. Bid farewell to the stress and uncertainty of water damage and trust in our tailored solutions to fortify your property against future flooding threats. Contact us now to schedule an assessment and take the vital step towards safeguarding your home from the perils of basement flooding. Count on Triad Basement Waterproofing to provide you with the peace of mind you need for a secure and protected living space.
-
5 Clear Signs Your Home Needs Foundation Waterproofing
Expert Home Foundation Waterproofing
Unlock comprehensive protection for your Gaithersburg, MD home with our foundation waterproofing services. Your home’s foundation is its backbone, and safeguarding it is paramount. Triad Basement Waterproofing specializes in providing top-tier foundation wall waterproofing solutions that shield your property from moisture, leaks, and potential damage. Contact us today to schedule a consultation and explore how our waterproof foundation services can benefit you.

What Is Foundation Waterproofing?
Foundation waterproofing is a comprehensive process designed to protect a building’s foundation from water intrusion and moisture-related issues. This technique involves applying specialized waterproofing materials to the foundation walls’ exterior and/or interior to create a barrier against water penetration. The goal is to prevent groundwater, rainwater, and other forms of moisture from seeping into the foundation and causing problems such as leaks, cracks, and mold growth. Interior foundation waterproofing can encompass various methods, including coatings, membranes, drainage systems, and sealants, tailored to the specific needs of the building and its surrounding environment.
Signs Your Home Needs Foundation Waterproofing
Recognizing the signs that your home requires foundation waterproofing is essential to prevent water-related issues from escalating. Watch out for these indicators, which may signal the need for professional intervention:
- Visible Cracks – Noticeable cracks in the foundation walls or floor can indicate water pressure and infiltration, highlighting the necessity of waterproofing.
- Dampness or Mold – Moisture buildup, condensation, and mold growth in the basement or crawl space are strong signs that water is infiltrating the foundation.
- Efflorescence – White, chalky deposits on foundation surfaces often indicate water seepage, emphasizing the need for waterproofing.
- Musty Odors – A persistent musty smell in your basement can suggest the presence of excess moisture, necessitating waterproofing measures.
- Water Stains – Stains on basement walls or floors indicate past or ongoing water intrusion, underscoring the importance of addressing the issue.
- Bowing or Leaning Walls – Foundation walls visibly bowing, leaning, or tilting are likely compromised by water pressure and require waterproofing.
- Pooling Water – Standing water or puddles in the basement after rainfall or snowmelt suggest poor drainage and the potential for leaks.
- Rust or Corrosion – Rust on metal components such as support beams or fasteners indicates exposure to moisture, necessitating preventive measures.
- High Humidity Levels – Excessively humid indoor air can result from water infiltration, emphasizing the need for proper waterproofing to regulate moisture.
- Decreased Energy Efficiency – Escalating energy bills due to excessive humidity, dampness, or inefficient heating and cooling systems can result from inadequate waterproofing.
Top Benefits of Home Foundation Waterproofing
Waterproofing house foundation services offer a range of benefits that extend beyond the immediate protection of your home. This essential practice safeguards your property’s structural integrity and overall living environment. Explore the advantages below:
- Prevents Water Damage – Waterproofing shields your foundation from water infiltration, preventing costly damage such as cracks, leaks, and deterioration.
- Mold Prevention – Waterproofing minimizes the conditions that foster mold and mildew growth by keeping moisture at bay, enhancing indoor air quality.
- Extended Foundation Lifespan – A dry foundation is less prone to wear and erosion, leading to a longer-lasting and more durable foundation structure.
- Increased Home Value – A waterproofed foundation adds value to your property by assuring potential buyers of a well-maintained and protected structure.
- Healthier Indoor Environment – Waterproofing reduces the risk of mold-related health issues, creating a safer and more comfortable living space for you and your family.
- Energy Efficiency – A dry foundation promotes better temperature regulation, which can lead to energy savings by allowing heating and cooling systems to function optimally.
Contact Triad Waterproofing Today
Safeguard your Gaithersburg, MD residence with the unmatched excellence of Triad Basement Waterproofing‘s foundation waterproofing services. Our team‘s unwavering commitment to quality ensures that your property’s foundation remains impervious to moisture, preserving its strength and value for years. Don’t allow water to compromise the core of your home. Connect with us today to arrange a consultation and proactively fortify your foundation.
-
Basement Drainage System Services in Gaithersburg, MD
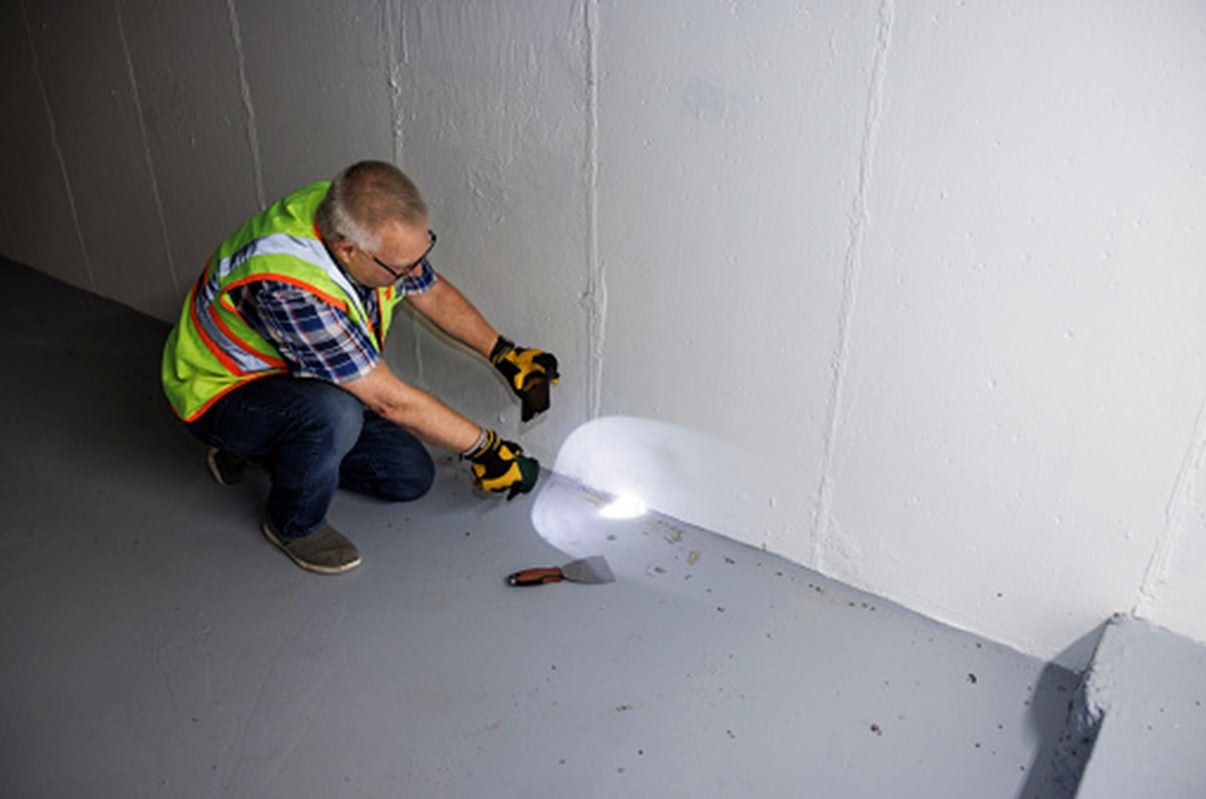
We Specialize in Inspecting Basement Drainage Systems
Experience dry and problem-free basements with our expert basement drainage system services in Gaithersburg, MD. Put an end to water woes and safeguard your property from potential damage. Triad Basement Waterproofing specializes in creating effective and efficient drainage solutions that keep your basement dry and your worries at bay. Contact us today to schedule a consultation and discover how we can transform your space.

What Is a Basement Drainage System Inspection?
A basement drainage system inspection involves thoroughly assessing your property’s drainage infrastructure to identify potential issues and ensure its effectiveness in managing water. Our experts at Triad Basement Waterproofing examine components like sump pumps, drains, and waterproofing systems to determine if they function optimally. By identifying any weaknesses or areas of concern, we can address them proactively, preventing water damage, mold growth, and other issues that can compromise the integrity of your basement.
Why is Basement Inspection So Important?
A house basement drainage system inspection holds paramount importance in maintaining your home’s structural integrity and overall health. Over time, drainage systems can experience wear and tear, compromising functionality and potential water-related issues. Regular inspections by professionals like Triad Basement Waterproofing help identify hidden problems such as clogs, leaks, or deteriorating components. Addressing these concerns promptly prevents water accumulation, mold growth, and potential damage to your basement and its contents.
Causes of Water Intrusion in the Basement
Understanding the causes of water intrusion in the basement is essential to prevent and address potential issues effectively. Various factors can contribute to unwanted moisture. Explore the common culprits below:
- Poor Grading – Improperly sloped landscaping around the foundation can lead to water pooling against the basement walls, increasing the risk of leaks.
- Cracks in Foundation Walls – Structural cracks can allow water to seep through the foundation, leading to moisture buildup and potential flooding.
- Inadequate Waterproofing – Insufficient or deteriorating waterproofing materials can fail to create a barrier against groundwater penetration.
- Faulty Gutters and Downspouts – Improperly functioning gutters and downspouts can direct rainwater toward the foundation, causing water to infiltrate the basement.
- Sump Pump Malfunctions – A malfunctioning sump pump or an absent one can result in poor basement drainage, leading to flooding.
- Window and Door Leaks – Poorly sealed windows and doors can allow rainwater to enter the basement, contributing to dampness and mold growth.
- Plumbing Leaks – Leaking pipes or plumbing fixtures within or near the basement can introduce moisture and cause water intrusion.
Prevention Methods for Water Intrusion in the Basement
Shielding your basement from water intrusion requires proactive prevention methods to maintain a dry and secure space. Discover the strategies below that can safeguard your home against potential moisture-related issues:
- Proper Grading – Ensure proper landscaping slopes away from the foundation to direct water away from the basement walls, minimizing the risk of water accumulation.
- Foundation Sealing – Apply a quality waterproofing sealant to foundation walls to create a barrier against water infiltration through cracks and pores.
- Regular Gutter Maintenance – Keep gutters and downspouts clean and properly positioned to channel rainwater away from the foundation, reducing the likelihood of basement leaks.
- Sump Pump Maintenance – Regularly inspect and maintain your sump pump to ensure it’s functioning correctly, efficiently removing water from the basement.
- Window and Door Sealing – Properly seal windows and doors to prevent rainwater from seeping through gaps and joints, helping to keep your basement dry.
- Interior Drainage Systems – Consider installing an interior drainage system that collects and redirects water away from the foundation, reducing the risk of water intrusion.
- French Drains – Installing French drains around the perimeter of the foundation can effectively divert groundwater away from the basement walls.
- Foundation Ventilation – Ensure adequate ventilation to prevent condensation buildup, which can lead to dampness and mold growth.
Contact Triad Waterproofing Today for Immediate Assistance
Secure the future of your Gaithersburg, MD home with Triad Basement Waterproofing‘s unparalleled basement wall drainage system services. Say goodbye to dampness, mold, and potential structural issues, as our expert team ensures your basement remains dry and protected. We take pride in our commitment to quality and our ability to deliver results that stand the test of time. Contact us now to schedule a consultation and take the proactive step towards a waterproofed basement that truly adds value to your life and home.
-
How To Keep Your Crawlspace Dry
Crawlspace Moisture Control in Gaithersburg, MD

Count on Us to Keep Your Crawlspace Dry
A damp and moisture-laden crawlspace can lead to many problems, including mold growth, structural damage, and compromised indoor air quality. Triad Waterproofing is here to help you keep your crawlspace dry and protected in Gaithersburg, MD. With our expert knowledge and comprehensive solutions, we address the root causes of crawlspace moisture, ensuring a healthier living environment for you and your family. Don’t let a wet crawlspace affect the integrity of your home. Contact Triad Waterproofing today and take the first step toward a dry crawlspace.
What Is a Crawlspace?
A crawl space is a shallow, unfinished area typically found beneath a house, providing access to plumbing, electrical systems, and sometimes HVAC equipment. It is called a “crawl” space because the limited height makes it necessary to crawl or crouch while moving within the space. Crawl spaces are typically ventilated and serve as an alternative to basements in homes where a full basement is not feasible or necessary.
Causes of Excessive Crawlspace Moisture
Various factors can cause excessive crawlspace moisture. Some of the main causes include:
● Poor Ventilation – Inadequate airflow and ventilation in the crawlspace can lead to moisture buildup. Without proper ventilation, humid air gets trapped, increasing the moisture levels in the crawlspace.
● Water Intrusion – Water seepage through foundation cracks, plumbing leaks, or inadequate drainage systems can introduce moisture into the crawlspace. Poor grading around the house, improper gutter, and downspout systems can also contribute to water intrusion.
● High Humidity – Areas with high humidity levels can result in high moisture content in the crawlspace. Moisture from the surrounding soil and groundwater can evaporate, raising humidity levels and increasing the risk of condensation and moisture-related issues.
● Plumbing Issues – Leaking pipes or plumbing fixtures in the crawlspace can contribute to excessive moisture. Condensation from pipes can also be a source of moisture if they are not properly insulated.Why Moisture is Not Good for Your Crawlspace
Moisture is not good for your crawlspace. In fact, it can cause significant harm. Excessive moisture in the crawlspace creates an ideal environment for mold growth, which can lead to health issues and structural damage. Mold thrives in damp conditions and can spread quickly, releasing spores that can contaminate the air you breathe. Additionally, moisture can cause wood rot, compromising the structural integrity of your home. It can also attract pests like termites and contribute to the deterioration of insulation and other materials. Therefore, it is essential to promptly address moisture issues in your crawlspace and implement proper moisture control measures to protect your home and ensure a healthy living environment.
How to Keep Your Crawl Space Moisture-Free
Maintaining a moisture-free crawl space is vital for the overall health of your home. Here are some practical tips from our experienced team to help you dry a wet crawlspace:
● Inspect for Damage and Repair – Regularly inspect your crawl space for any signs of damage or moisture intrusion and promptly address any issues to prevent further moisture problems.
● Make Sure Your Foundation Is Insulated – Properly insulating the foundation walls of your crawl space can help regulate temperature and reduce the risk of condensation and moisture buildup.
● Get a Dehumidifier – Installing a dehumidifier in the crawl space helps to control humidity levels and prevent excess moisture from accumulating.
● Drain Your Crawl Space Better – Ensure proper drainage around your home by redirecting downspouts away from the foundation and grading the soil away from the crawl space to prevent water pooling.
● Cover the Floor of Your Crawl Space – Use a vapor barrier or moisture-resistant material to cover the crawl space floor, preventing moisture from the ground from seeping into the space.
● Use a Fan – Increase air circulation in the crawl space by using a fan, which helps to reduce moisture and prevent stagnant air.Contact Triad Waterproofing Experts for Help
Triad Waterproofing is your trusted partner in keeping your crawlspace dry and protected in Gaithersburg, MD. Our comprehensive crawlspace dehumidifier solutions, backed by years of experience and expertise, ensure your home remains free from moisture-related issues. From crawl space encapsulation to efficient drainage systems, we offer tailored solutions addressing your crawlspace moisture problems. Don’t let a damp crawlspace compromise the integrity of your home any longer. Contact us today to schedule your consultation.
-
Signs You Could Have Black Mold in Basement
Black Mold Removal Services in Gaithersburg, MD

We Specialize in Black Mold Removal
Say goodbye to the hazardous black mold in your Gaithersburg home with Triad Waterproofing’s professional black mold removal services. Our skilled team of experts specializes in identifying and safely eliminating black mold in your basement, restoring the cleanliness and safety of your living space. With years of experience and advanced techniques, we ensure thorough and effective mold removal, leaving no room for compromise. Contact Triad Waterproofing and let us handle your black mold concerns precisely and carefully.
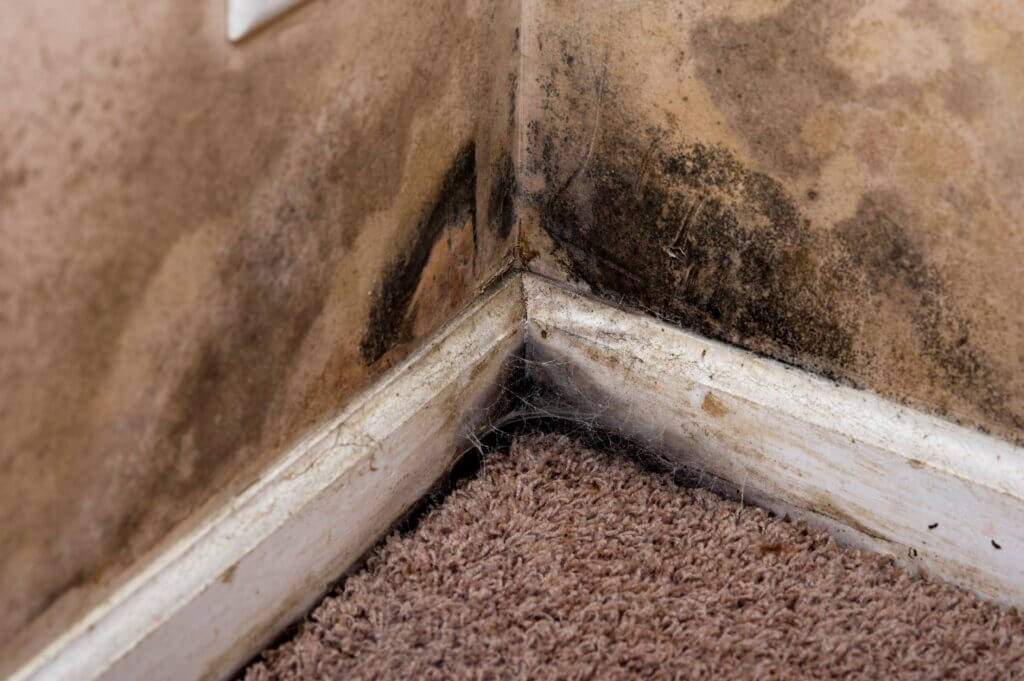
What Is Black Mold?
Black mold, scientifically known as Stachybotrys chartarum, is a toxic mold commonly growing in damp and humid environments. It appears as dark greenish-black patches or spots on surfaces such as walls, ceilings, and other organic materials. Black mold releases spores into the air, which can be inhaled and pose potential health risks to humans. Exposure to black mold can lead to various symptoms, including respiratory issues, allergic reactions, skin irritation, and in some cases, more severe health problems. It is important to address black mold promptly and seek professional assistance for its safe removal and remediation.
How Serious Is Black Mold in the Basement?
Black mold in the basement is a serious concern that should not be taken lightly. Basements are often prone to moisture problems, which create an ideal environment for mold growth, including black mold. Here are some reasons why black mold in the basement is considered serious:
● Health Risks – Black mold releases spores into the air, which can cause various health issues when inhaled. Exposure to black mold can trigger allergic reactions, respiratory problems, asthma attacks, and other respiratory symptoms. Prolonged exposure or individuals with compromised immune systems may experience more severe health complications.
● Structural Damage – Black mold thrives on organic materials such as wood, drywall, and insulation. As it grows and spreads, it can gradually deteriorate the structural integrity of your basement. Black mold on your basement floor can weaken the materials, leading to rot, warping, and potential structural damage. This can impact the stability of your home’s foundation and pose safety risks.
● Spread to Other Areas – Mold spores are microscopic and easily dispersed through the air or by attaching to clothing and objects. If not addressed promptly, black mold in the basement can spread to other areas of the house, contaminating additional spaces and making mold remediation more challenging and costly.
● Property Value – Black mold on basement walls can significantly impact the value of your property. The presence of mold and the associated health and structural risks may deter potential buyers. Addressing mold problems promptly is crucial for preserving the value of your home.Signs of Black Mold
Identifying the presence of mold in your basement is crucial for maintaining a healthy living environment. Here are some common signs our experienced team is trained to look out for:
● Water Puddles on the Basement Floor – Puddles on the basement floor indicate a potential water intrusion issue, which can create a conducive environment for mold growth if not addressed promptly.
● Damp Spots on Basement Walls – Damp spots or discoloration on basement walls often indicate excessive moisture or water seepage, leading to mold growth if the underlying cause is unresolved.
● Musty Smells – Musty odors in the basement are often a clear indication of mold presence. The characteristic earthy or mildew-like smell suggests an active mold infestation that requires immediate attention and remediation.
● Mold Patches – Visible mold patches, such as dark or fuzzy growth on surfaces, are a direct sign of mold infestation. These patches should be treated seriously and addressed promptly to prevent mold spread and potential health risks.
● Condensation in the Basement – Excessive condensation on windows, pipes, or other surfaces in the basement indicates high humidity levels. Persistent condensation can contribute to mold growth, and steps should be taken to improve ventilation and control moisture levels.Contact Triad Waterproofing for Quick Help
At Triad Waterproofing, we prioritize the safety and well-being of our customers in Gaithersburg, MD. Our black mold removal services are designed to eliminate the risks associated with this harmful substance and restore a healthy living environment. With our expertise, state-of-the-art equipment, and commitment to excellence, you can trust us to eliminate black mold in your basement with precision and care. Don’t let black mold compromise the health of your loved ones or the structural integrity of your home any longer. Contact Triad Waterproofing today.
-
Understanding the Top 3 Basement Waterproofing Methods
Understanding the Top 3 Basement Waterproofing Methods
There are few things worse for a homeowner than a wet basement. What appears to be just a tiny trickle or small puddle are the warning signs of a much bigger problem. Moisture in your basement can lead to an array of costly and time-consuming repairs. From structural damage to toxic mold, water in your basement is a serious problem. So what can we do to keep our basements dry and prevent moisture from making its way in?
Check out our top 3 basement waterproofing methods below to learn more.

What Causes Basement Moisture?
To best understand how to keep your basements dry, we need to have a thorough understanding of what causes moisture to occur in basements in the first place. Unfortunately for homeowners, water has a knack for finding its way into our homes. Due to the unique nature and construction of basements, these spaces are particularly prone to wetness. The points below highlight some of the primary causes of basement moisture:
-
Improper Soil and Drainage Systems:
If rain and groundwater cannot drain away properly it can make its way into your basement. Improper soil and poor drainage systems are one of the most common causes of basement wetness. If water isn’t directed away from the home, it will accumulate around the foundation, where it will try to find a way inside.
-
Poorly Installed and Maintained Gutters:
Gutters are intended to direct rainwater away from your foundation. If they are improperly installed or too clogged to function, water will drain around your foundation, rather than away from it.
-
Improper Slope:
The ground around your foundation should slope away from your home, not towards it. If the slope is wrong, water will accumulate around your foundation, rather than running away from it.
-
Hydrostatic Pressure:
Hydrostatic pressure occurs when water accumulates around your foundation. As gravity pushes down on that water, it will try to escape, in an effort to relieve that pressure. The water will force its way through any cracks in your basement walls and floors. In fact the pressure can get so strong, that it will cause cracks.
-
Cracks in Your Basement:
Cracks in your basement walls, floors, and around windows or doors provide the perfect avenue through which water can flow. Water will always follow the path of least resistance and these cracks make it easy for water to come inside.
-
Condensation:
Basements are notoriously damp places. When condensation occurs, it can bring mildew, mold, and potential damage along with it.
The list above is just a basic overview of the causes of basement moisture. To learn more about the causes behind basement moisture, click here to read our blog post about the subject.
The Top 3 Basement Waterproofing Methods
Now that we have a better understanding of what causes basement moisture, let’s talk about what we can do to prevent it. There are 3 methods to basement waterproofing:
#1. Interior
These are steps that can be taken to keep water out of your basement from the inside. These methods are often used after an existing problem has been identified. This can include sealants and coatings, as well as methods to prevent condensation.
#2. Exterior
As you would expect, these are methods that take place on the outside of your home. The goal with these methods to block water from ever making its way inside in the first place. This can include exterior drainage systems and coating the exterior walls with a waterproof barrier.
#3. Drainage
Drainage issues are one of the most common causes of basement moisture. This method can include repairing a poorly functioning drainage system, or adding a drainage system if there isn’t one in place.
Each situation is different, so it is important to have a good understanding of what waterproofing issues are present in your home. A truly effective waterproofing system will utilize all 3 methods.
Now let’s take a closer look at each of the 3 waterproofing methods and learn more.
Interior Waterproofing
Interior waterproofing methods are typically the easiest and most affordable. These typically begin with ensuring that any cracks or holes in your basement walls, floors, and around windows and doors, are properly sealed and watertight. Water most frequently makes its way into our basement via these cracks, so properly sealing them is the first step towards ensuring your basement stays dry. Special sealants can be used to effectively fill any cracks, preventing any new moisture from traveling inside. These sealants are typically quite effective and often come with extended warranties, guaranteeing their effectiveness.
Interior waterproofing methods, such as waterproof sealants, also do a good job at keeping humidity levels down, preventing condensation. These coatings can be put onto basement walls and floors creating a waterproof barrier. While these interior sealants are an important step in the overall waterproofing process, they do not address the underlying problems causing the moisture. The bigger problems are usually found on the outside.
Exterior Waterproofing
When it comes to wet basements, the root of the problem is typically located outside of the home. So when it’s time to waterproof your basement, it is important to look outside of your basement walls. Exterior waterproofing is typically a much larger undertaking than the simple sealing process we use on the inside. It is a good idea to consult a professional when considering exterior waterproofing methods.
Exterior waterproofing typically requires the excavation of the soil surrounding the foundation of the home. As you can imagine, this can be a labor-intensive process, requiring heavy tools and machinery. Once all the soil around the foundation has been removed, a waterproof sealant can be applied to the exterior walls. This sealant is typically a polymer base, which should last for the life of the building. Ideally, this exterior waterproofing process should occur during construction.
It is also important to mention gutter systems when discussing exterior methods. When properly installed, gutters direct rainwater away from the foundation of your home. However if not properly installed or maintained, these systems can have the opposite effect. Clogged gutters or gutters that drain to close to your foundation will deposit water along the base of your home, exactly where you do not want it be. Make sure to keep your gutters clean and free of debris to keep them working properly. Ensure you have proper downspouts that direct water as far away from your home as possible.
Drainage Systems
Drainage problems are often the underlying cause of moisture in your basement. Having proper drainage around your home is essential if you want to keep your basement dry. The goal of these drainage systems is to direct water (whether it be groundwater or rainwater) away from the foundation of your home. There are numerous different drainage systems available to help control the water around your home. To start, you should examine the soil around your house. Different types of soil drain in different ways. Be sure your home is surrounded by soil that drains easily and does not retain moisture.
Each home is different, so be sure to thoroughly examine how the drainage around your home is functioning. Take a look at the slope of the ground around your foundation. It should slope away from your foundation, not towards it. Depending on your specific situation, it may be necessary to install a sump pump to collect water from the inside and pump it away. These interior drainage systems collect water from around your foundation and pump it out away from your basement.
These systems should be designed to function in case of a power outage. As one might imagine, installing a sump pump or other interior drainage system can be quite the undertaking. It is advisable to consult a professional when considering this type of waterproofing method.

Which Method is Right for You?
As we mentioned earlier, each home is different. Thus the best waterproofing method for your home may be different than of your neighbor. There are so many factors that come into play when it comes to keeping your basement. While each situation is different, the best policy is always prevention rather than repair. Taking steps to waterproof your basement before water is present is sure to yield the best results. Water damage can cause major problems, resulting in costly repairs and lots of headaches.
While it is often tempting to save money now by ignoring the problem, waiting to address your basement waterproofing can lead to much bigger bills in the future. Basement waterproofing methods can vary greatly, so be sure to do your research and find out what method is the most appropriate for your unique situation.
Your home is your biggest investment. It is important to take the necessary steps to protect it. Don’t wait until you have a problem to do something about it. Taking preventative measures can keep your basement dry and your pockets full. Reach out to our experienced team at Triad Basement Waterproofing to learn more about keeping your basement dry this winter. Contact us today!
-